


Home | Articles | Analog Film
Lightroom Grain Settings: Amount, Size & Roughness Explained
Richard ♦ June 11, 2026 ♦ 13 min read
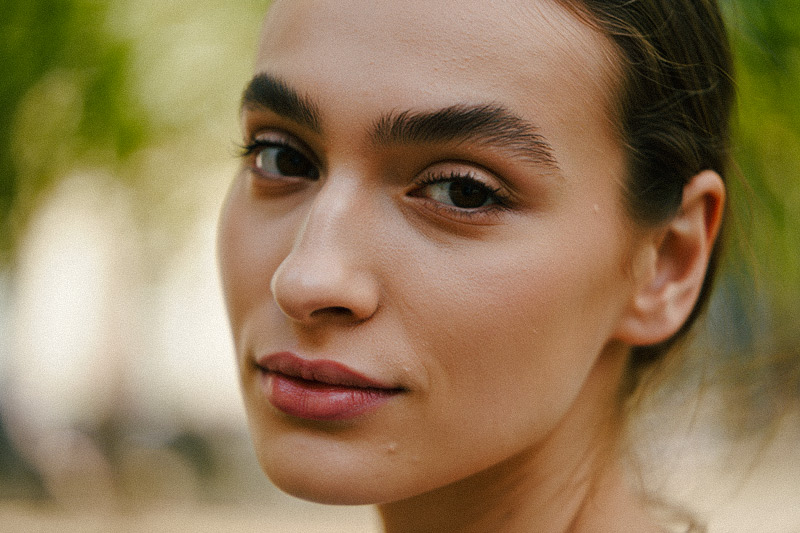
If you’ve searched for the Lightroom grain panel and landed here instead of the Adobe help page, good, this is more useful. The official documentation tells you what each slider is called. This tells you what each one actually does, why the defaults are wrong for a film look, and what numbers to use for specific film stocks.
The short version: Amount controls how much grain is visible. Size controls how large each grain particle is. Roughness controls how random and organic the grain looks. Getting all three right at the same time is where most people get stuck.
Key takeaways
- Finish all color and tone edits before touching grain, grain reacts to contrast, so changing exposure afterward shifts how visible it appears
- Sharpen first, then add grain, Lightroom overlays grain on top of the sharpened image, not underneath
- Keep Roughness at 40 minimum, anything lower looks like uniform digital noise, not film
- At Size 25 or above, Lightroom automatically adds a blue tint to make grain interact better with noise reduction, this is by design, per Adobe’s documentation
- Match grain size to your export resolution, grain set for a 24MP file will look twice as heavy on an Instagram 1080px export
- For most portrait and lifestyle photography, Amount 20–25, Size 25–30, Roughness 45–55 is the right starting zone
01.
Where to Find the Grain Panel in Lightroom
In Lightroom Classic: Develop module → Effects panel → Grain section (just below Vignetting). Both Grain and Vignetting are off by default (Amount = 0).
In Lightroom (cloud-based): Edit → Effects → Grain.
The three sliders, Amount, Size, Roughness are the same in both versions.
Stop Guessing. Start Creating.
Don’t waste hours obsessing over grain sliders. Get authentic film texture across 14 classic stocks – Portra, Ektar, Fuji Pro, TRI-X and more – with presets, profiles and LUTs included.
02.
What Each Slider Actually Does
This is what most articles skip. Understanding the mechanics saves you from guessing.

Amount
Controls how much grain is applied, on a scale of 0 to 100. At 0, no grain. At 1, barely anything. Most real film looks live between 15 and 40.
What trips people up: Amount doesn’t work in isolation. A high Amount with a low Size looks like digital noise. A high Amount with a high Roughness can look like someone filtered the image. Amount only reads as “film” when Size and Roughness are calibrated alongside it.
Starting point: 20 for subtle texture. Move up in increments of 5.
Size
Controls how large the individual grain particles are. The scale runs from 0 to 100, but most usable film looks live between 15 and 45.
One thing Adobe’s documentation notes that almost nobody talks about: at Size 25 or above, Lightroom adds a slight blue channel adjustment to the grain to make it interact more naturally with noise reduction. This is intentional behavior, not a bug. It’s one reason grain starts looking more “film-like” once you pass size 25.
What each range references in real film terms:
- Size 10–20: Very fine grain, references ISO 50–100 film like Kodachrome 64 or Kodak Ektar 100
- Size 20–30: Standard grain, references ISO 400 stocks like Kodak Portra 400 or Fujifilm Superia 400
- Size 30–45: Coarser grain, references pushed film or high ISO stocks like Kodak T-MAX 3200 or Fujifilm Natura 1600
Size 45+: Very coarse, references heavily overexposed or aged film; rarely needed
Roughness
Controls how random and irregular the grain pattern looks. This is the most misunderstood slider and the one most likely to make grain look fake when set wrong.
- 0–30: Grain looks uniform and repeating, this is the digital noise territory. Avoid it for film looks.
- 40–55: The sweet spot. Moderate irregularity that reads as organic texture.
- 55–70: Higher irregularity, appropriate for older film stocks, B&W documentary work, pushed film.
- 70+: Very rough, specific use cases only (very old film, heavily stylized edits).
Practical rule: Roughness should almost always be higher than or equal to Size. When Roughness drops significantly below Size, grain starts to look strange, clumped rather than scattered. Keep them in a similar range or push Roughness higher.
03.
The Right Order of Operations
This matters more than the actual numbers.
- Set exposure and white balance before anything else
- Finalize your tone curve and HSL adjustments, grain reacts to contrast, so any tonal change afterward shifts grain density visually
- Apply sharpening in the Detail panel: Amount 40–70, Radius 0.7–1.0, Detail 25–40. Hold Alt while dragging the Masking slider to confine sharpening to edges only
- Apply noise reduction if your base image has high ISO noise, Luminance 15–25 is usually enough to clean the base before grain goes on top. Don’t skip this step on ISO 1600+ files
- Add grain last in the Effects panel
The reason sharpening comes before grain: Lightroom overlays grain on top of the sharpened image as a separate layer. If you sharpen after adding grain, you’re sharpening the grain itself, which destroys the texture.
Grain Settings by Film Stock
These are specific starting points, not rigid rules. Adjust based on your camera, exposure, and taste.
| Film Stock | Amount | Size | Roughness | Character |
| Kodak Portra 160 | 15–18 | 20–25 | 40–45 | Barely visible, silky |
| Kodak Portra 400 | 20–25 | 25–30 | 45–50 | Subtle, warm texture |
| Kodak Portra 800 | 28–35 | 28–35 | 50–58 | Visible, slightly punchy |
| Kodak T-MAX 100 | 15–20 | 18–24 | 42–48 | Fine, clinical |
| Kodak Tri-X 400 (B&W) | 32–40 | 30–38 | 55–65 | Classic documentary |
| Kodak T-MAX 3200 | 45–55 | 38–48 | 60–70 | Heavy, expressive |
| Fujifilm Provia 100F | 14–18 | 18–22 | 38–44 | Very fine, neutral |
| Fujifilm Superia 400 | 20–26 | 24–30 | 46–52 | Medium, slightly cool |
| Fujifilm Natura 1600 | 38–48 | 35–45 | 58–68 | Coarse, atmospheric |
| Fujifilm Neopan 400 (B&W) | 30–38 | 28–35 | 52–62 | Strong B&W texture |
| Kodachrome 64 | 14–18 | 16–22 | 35–44 | Extremely fine, sharp |
| Vintage / aged film | 30–42 | 35–45 | 55–65 | Uneven, nostalgic |
To match these presets to the right base color look, the Kodak Lightroom Presets and Fuji Lightroom Presets at Legendary Presets already have grain baked in and calibrated against actual film scans, so if you’re using those, you may only need to fine-tune rather than start from zero.
04.
Grain for Color vs. Black and White
These are two different workflows.
Color photography: grain should be subtle enough that you notice the texture before you notice the grain. Amount 15–30 for most situations. The goal is for skin, fabric, and skies to feel “physical” rather than clinical.
Black and white photography: grain is part of the look, not a side effect. B&W removes the color texture that naturally separates tones, so grain does heavier lifting. Amount 30–45 is normal. Roughness 55–70 works better with monochrome tones than the smoother settings you’d use for color. This is the classic documentary grain you’d associate with Kodak Tri-X 400.
For B&W specifically: zoom to 100% and confirm the grain is slightly visible before exporting. If it’s invisible at 100%, it won’t survive downscaling. If it’s overwhelming at 100%, back off the Amount by 5–10.
05.
The Lightroom Masking Grain Feature (Most People Miss This)
In June 2023, Adobe added grain controls to the Masking panel in Lightroom Classic 12.4. This is genuinely underused.
What it lets you do: add different amounts of grain to different tonal regions, specifically, more grain in highlights and midtones, less in shadows. This is how real film actually behaves. Film grain is most visible in the midtones and upper shadows, not in the deepest blacks.
How to use it:
- In the Develop module, open Masking
- Create a Luminance Range mask targeting midtones and highlights (roughly luminance 30–100)
- In the Effect section of that mask, use the Grain Amount slider to add grain only to that range
- Use the global Effects panel to set Size and Roughness, these are global settings that apply to all grain, masked and unmasked
Note: Size and Roughness in the global Effects panel control the character of all grain across the image. Only Amount can be targeted per mask.
This technique is the closest Lightroom gets to how actual film handles grain distribution, and it makes a visible difference on portraits where you want grain in the background and midtones but cleaner skin.
06.
Protecting Skin and Detail
Grain is most destructive in smooth areas, skin, sky gradients, out-of-focus backgrounds. Two ways to handle it:
Option 1, Global restraint: Keep Amount at 25 or below for portrait work. Most skin will be fine at this level on a properly exposed file.
Option 2, Masking: Use Lightroom’s brush mask on faces. Reduce the Grain slider within that mask to 0 or near 0. This keeps grain in backgrounds and clothing while removing it from skin.
For the sharpening side: use the Masking slider in the Detail panel (hold Alt while dragging to see the mask in greyscale) to limit sharpening to hard edges only. Skin should be in the black/protected zone.
07.
Grain and Export Resolution
This is where most people get surprised.
A file at 24MP has roughly 6000px on the long edge. At that resolution, Amount 25 looks subtle. Export the same file at 1080px for Instagram and the grain is now 5.5 times denser relative to the image, it can become overwhelming or, conversely, disappear entirely depending on how Lightroom downsamples.
The fix: before finalizing grain settings, export a test file at your actual delivery resolution. On Instagram exports (1080px), add 5–8 extra Amount above what looks right on screen. For print, reduce slightly, printed grain is more forgiving because ink diffuses texture naturally.
The same logic applies to Lightroom Mobile vs. Desktop. If you’re editing on a phone screen at 1x, grain that looks subtle will appear heavier on a retina display at full zoom.
I spent a long time pushing Roughness too low, somewhere around 25–30, thinking it made grain look “cleaner.” It didn’t. It made it look like digital banding. The shift that changed my edits was treating Roughness as the primary authenticity control and Amount as just the volume. Once Roughness is right (40 minimum, usually 48–55 for color work), everything else becomes much easier to calibrate.
The other thing that helped: stopping the habit of judging grain at fit-to-screen view. Grain is a 100% zoom decision. Always check it there before committing.
08.
Fixing Common Grain Problems
Grain looks like digital noise, not film texture Roughness is too low. Bring it above 40. If the problem persists, also check that you haven’t stacked grain on top of high-ISO sensor noise, apply Luminance Noise Reduction first.
Grain disappears after export Your export resolution is much smaller than your editing resolution. Add 5–8 to Amount and re-export at final size.
Grain looks like a filter, not film Amount and Size are both too high. The classic mistake: Amount 50 + Size 50. Drop both. Real film grain is fine even at high amounts. Try Amount 30 + Size 28 + Roughness 55 instead. If you’re starting from a well-calibrated base like the Kodak Film Lightroom Presets, grain is already dialed in and you may only need to adjust by ±5.
Skin looks muddy Either Amount is above 30 on a portrait, or you’re adding grain without sharpening first. Sharpen edges (Masking slider to 60+), then add grain, then check skin at 100%.
Grain looks uneven across the frame This is actually correct behavior if you’re using the Masking Grain feature. If you’re not, it may be ISO noise interacting with grain, apply noise reduction to the base file first.
09.
Q&A
What are the best grain settings for portraits in Lightroom?
Amount 18–25, Size 24–30, Roughness 45–52. Sharpen edges before applying grain and keep Amount below 28 on skin-heavy shots.
Does grain reduce sharpness in Lightroom?
Not technically, grain is a separate overlay and doesn’t blur pixel data. But visually, grain at Amount 30+ reduces perceived clarity, especially on smooth tones like skin. For clinical sharpness, keep Amount under 20.
Should I add grain to high ISO files?
Usually not without noise reduction first. Stack grain on top of ISO 3200 sensor noise and shadows become muddy fast. Apply Luminance NR 20–30, then add grain. This is also why Fujifilm Natura 1600 presets are built with heavier grain by default, the stock was designed for low light where noise is unavoidable.
What’s the difference between Lightroom film grain and a film grain overlay?
Lightroom generates synthetic grain mathematically, it’s fast and non-destructive but less variable than real film. Overlay-based grain (a separate texture file composited in Photoshop) can be more authentic but is heavier to work with and harder to adjust non-destructively.
Is Lightroom grain the same in Classic and the cloud version?
The three sliders behave the same way. The Masking Grain feature (2023) is available in Lightroom Classic. Cloud Lightroom has a simplified version.
Every stock in our film emulation presets collection has its own grain structure, color response, and tonal character, no two look the same under the same light.
Related Articles
- Kodak Film Lightroom Presets
- Fuji Lightroom Presets for Photographers
- Classic Kodak Color in Lightroom
- Fuji vs. Kodak Color Science in Lightroom
- Realistic Film Grain Without Losing Detail
Richard is a commercial and editorial photographer with over 15 years behind the lens. He’s shot on film and digital across three continents, and still keeps a Nikon F3 loaded with Kodak Portra on his desk. At LegendaryPresets, he leads preset development – studying actual film scans to make sure every stock behaves like the real thing.