


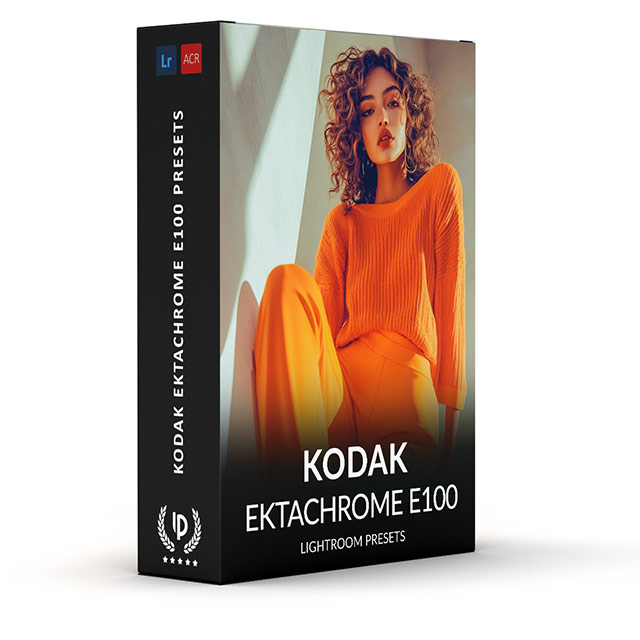




Kodak Ektachrome E100 Presets
$34.90
Are you spending hours editing your photos to get the perfect look? Capture the timeless essence of this iconic analog film and transform your digital images with its distinct color palette and subtle grain.
Get our presets and instantly edit your photos with stunning Ektachrome colors.
✓ 8 Kodak Ektachrome E100 Presets
✓ 20 Clean Edit Presets
✓ Professional Look with 1-Click
✓ Easy to use – Beginner-friendly
✓ Create your own Signature Style
✓ Instant Digital Download
 For Desktop & Mobile
Ektachrome E100 Colors? Yes Please!
“These Ektachrome presets really nailed that classic film look I’ve been chasing. Totally worth it!” – Burt F., Graphic designer
Photographers Love These Ektachrome E100 Presets
Capture the magic of classic film photography with Kodak Ektachrome E100 Presets for Lightroom. These presets bring your digital photos to life with vibrant colors and stunning detail. Get them now and create unforgettable images with ease.
What's Included:
What’s Included
» 8 Kodak Ektachrome E100 Presets
» 20 Clean Edit Presets
» 1x Instruction Guide (PDF)
» File formats: XMP, DNG
» 8 DNG Files
» Free Upgrades
Clean Edit Presets
Use the Clean Edit Presets to make basic adjustments and set the foundation for your image. They also speed-up your workflow and offer you endless style combinations.
 You receive this presets as digital download
immediately after purchase.
Compatible with:

Desktop
» Adobe® Lightroom® 7.5 or later
» Adobe® Camera Raw 10.5 or later
Mobile
» Adobe® Lightroom Mobile
» Android & iPhone
Get 8 Kodak Ektachrome E100
Film Simulation Presets

Ektachrome E100 base

Ektachrome E100 vivid

Ektachrome E100 cool

Ektachrome E100 warm

Ektachrome E100 pulled

Ektachrome E100 pushed

Ektachrome E100 flat

Ektachrome E100 balance








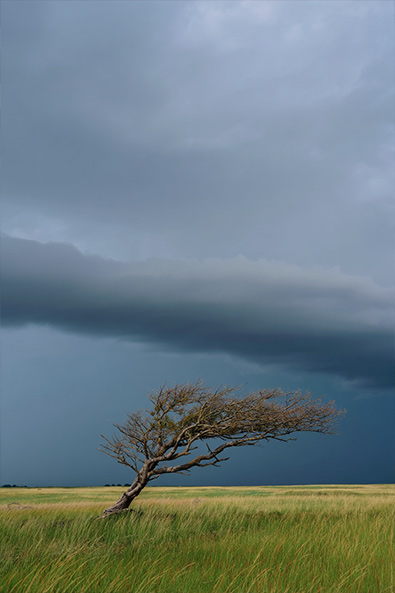
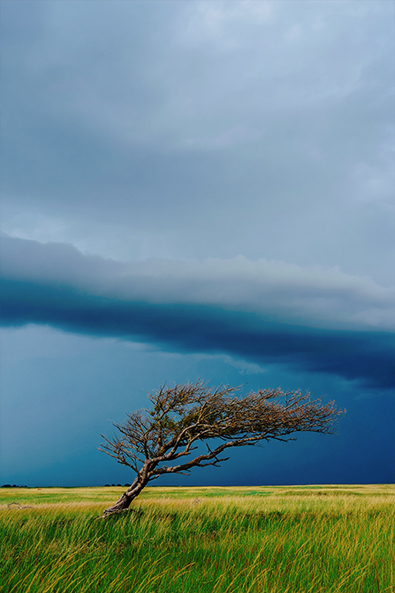




Get the classic film look in your edits with our analog film presets, find every stock in the Kodak Lightroom Presets range.

Professional Kodak Ektachrome E100 Film Simulation Presets.
Image: Kodak
Why is and was the Ektachrome E100 Film Popular?
Kodak Ektachrome E100 was insanely popular because it captured the vibrancy of real life like nothing else. I remember my first shot with it; it felt like stepping back into those carefree summer days when everything just popped with color. It’s not just a film – it’s a time capsule of emotions and adventures. It could handle anything from dazzling sunsets to bustling city scenes, making everyday moments extraordinary.
I still get goosebumps thinking about those candid moments, the raw authenticity, and the nostalgia it brings. Simply put, it made memories feel real and vibrant, forever transforming how I remember life.
Kodak initially discontinued Ektachrome films in 2012, they relaunched Ektachrome E100 in 2018, offering a redesigned version of the film stock for 35mm cameras.
Initial Discontinuation:
Kodak announced the discontinuation of several Ektachrome films, including E100G, E100VS, and Elite Chrome Extra Color 100, in early 2012, citing decreased sales and complex production.
Relaunch in 2018:
In late 2017, Kodak Alaris announced the relaunch of a redesigned version of the Ektachrome film stock as E100, specifically for 35mm cameras.
Specifications
| Feature | Details |
| Film Type | Color Reversal (Slide) |
| Format | Available in 35mm, 120, 4×5, and Super 8 formats |
| ISO Speed | ISO 100 |
| Color Balance | Daylight |
| Grain | Extremely fine (RMS granularity of 8) |
| Exposures per Roll | 36 (for 35mm format) |
| Processing Chemistry | E-6 |
| Dynamic Range | Approximately 5 stops |
Do you have Tips for the Presets?
Tips & Tricks for Ektachrome E100 Presets
- Experiment with different presets to find the perfect look for your photos
- Adjust the intensity of the preset to suit your image
- Use the presets as a starting point and fine-tune the settings to your liking
- Try the presets on a variety of subjects, from portraits to landscapes
- Combine the presets with other editing tools in Lightroom for more advanced editing
- Save your favorite preset combinations as custom presets for easy access
- Have fun and embrace the nostalgic charm of Ektachrome E100 in your Lightroom workflow
How to Download & Install the Presets?
As soon as your payment went through, you receive the download link direct by email.
Just follow the easy instructions at How to install Lightroom Presets and start using them on your desktop or mobile device.
How to use Lightroom Presets?
- The Kodak Ektachrome E100 Filters for Lightroom are crafted by professionals to enhance the visual look of photos. These Kodak presets are designed to complement a wide range of images, ensuring consistent results.
- The Presets are available for the the Desktop and Mobile App versions of Lightroom. The mobile app for Android and iPhone offers you nearly the same features like the desktop version to edit and transform your photos on the go.
- You can capture your photos using a DSLR, mirrorless camera, point & shoot camera, or even your smartphone. Import the image into Lightroom and apply the desired preset. This straightforward process allows you to achieve professional results with just a few clicks.
- Please note that the final outcome of a preset can vary depending on the characteristics of the original photograph, such as white balance, exposure, tones, and settings.
- After applying a preset, you can start to make manual adjustments to fine-tune the image to your liking. Lightroom offers a large set of sliders and tools, allowing you to tweak many aspects of the image until you achieve the desired outcome.
- In some instances, a preset may alter the skin tone of persons captured in the photograph. In this cases, utilize Lightroom’s powerful color adjustment tools to refine the skin tone until it appears natural and flattering.
- For optimal results, it’s recommended to use presets on well-exposed, high-quality RAW & JPG photographs. Images that are overexposed, underexposed, or of poor quality may yield unsatisfactory results when presets are applied.
How to use the Clean Edit Presets?
With our Clean Edit Presets you can set the perfect foundation of your image by adjusting for example white balance, exposure, whites, tones, etc. Each clean edit preset changes only one value, without overwriting other adjustments and values.
Can the Presets used in Photoshop?
You can use the Presets in XMP format also in Adobe Photoshop
Installing Presets in Adobe Camera Raw (ACR) 10.3+ (Windows & Mac)
- Open your image in Adobe Photoshop.
- At the top menue click on Filter and select “Camera Raw Filter”.
- On the right you see the word “Basic” click the small burger next to it. Then, click “Load Settings”.
- Choose the .xmp file(s) from downloaded and unzipped folder. Then click on “Load” button.
- To apply a preset, click on OK button.
How about License/Terms?
License Terms
The Presets are licensed for individual use only. Resale or redistribution is strictly prohibited. This non-transferable license is limited to the original purchaser and does not extend to companies or partnerships.
No Refunds
All sales of these digital products are final with no refunds, returns, or exchanges permitted due to their downloadable nature.
By purchasing, you agree to these terms.
Visitors are also interested in:
Kodak Portra 160
Kodak Ektar 25
Kodachrome 25
Kodachrome 64
Kodak Ektar 100
Kodak Ultra Color 100
4 reviews for Kodak Ektachrome E100 Presets
Only logged in customers who have purchased this product may leave a review.
Related products


$34.90


-67%

Original price was: $244.30.$79.90Current price is: $79.90.


$34.90


$34.90


$34.90


$34.90
Mariana B. –
This preset gives my photos such a bright, positive, and modern vibe. The colors are so punchy and clean!
Hudson W. –
Very happy with this presets.
Scarlett P. –
Finally, an E100 preset that understands it’s a slide film! Highly recommended!
Penelope G. –
It perfectly captures the look of my old Ektachrome slides from the 90s. Good result every time.