Home | Articles | Analog Film

Fuji Lightroom Presets for Portrait Photographers

Richard ♦ updated June 22, 2026 ♦ 19 min read

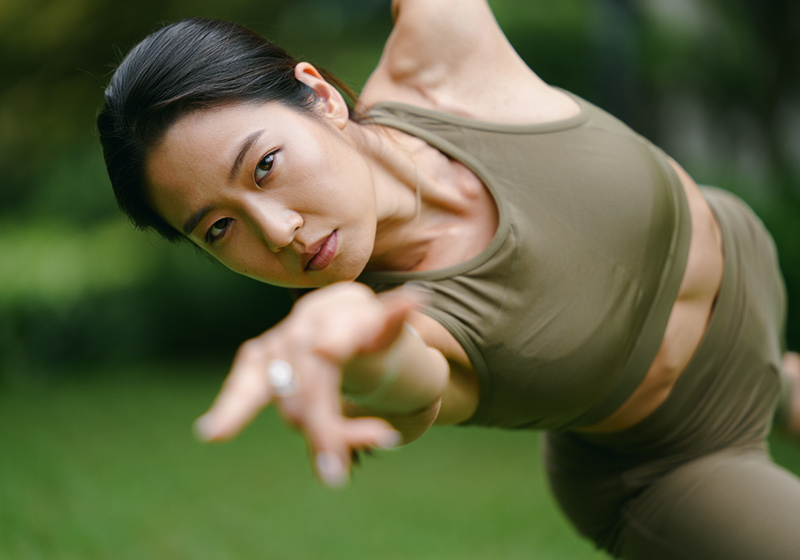
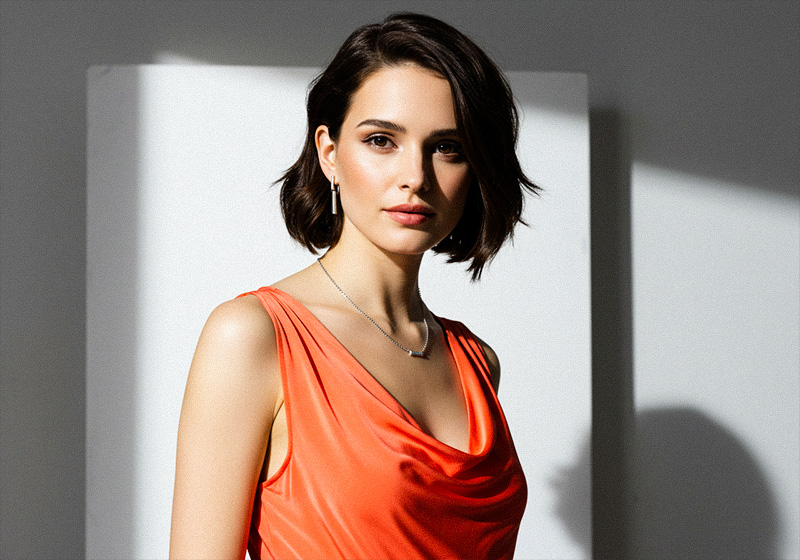
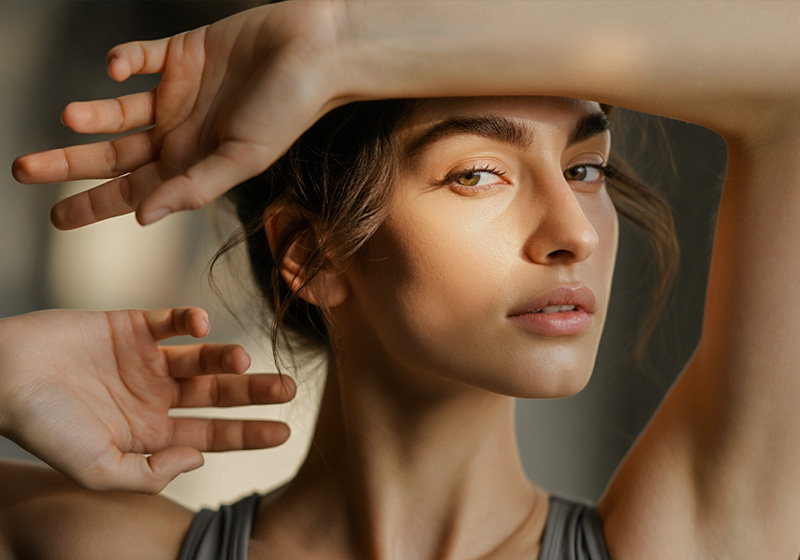
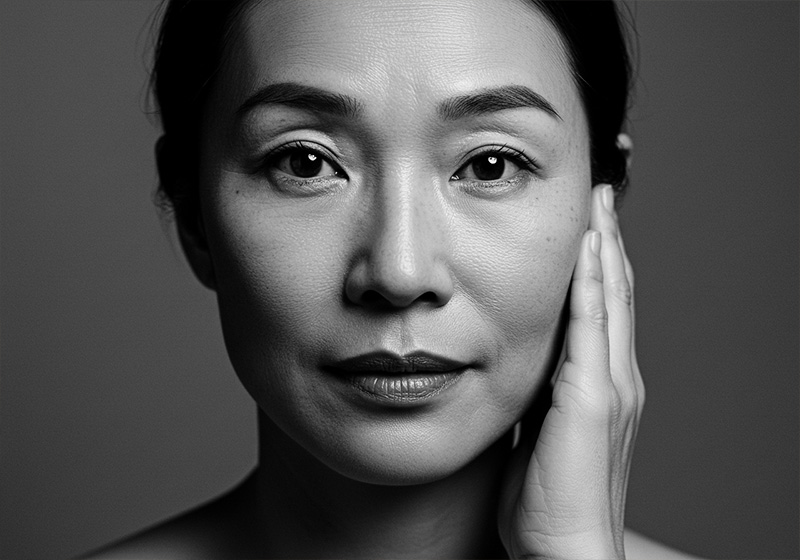
Fuji Lightroom Presets for Portrait Photographers - comparsion raw vs fuji preset

There is a reason portrait photographers loaded Fujifilm on their cameras for decades before digital took over. It is not just that Fuji made good film. It is that Fuji film handled skin differently from Kodak, and those differences were useful in specific, predictable ways.

Fuji’s negative film stocks have a slight green-cyan bias in the shadow tones. Kodak’s negative stocks lean warm, pushing skin toward orange in the shadows and midtones. Neither is objectively better. But they produce different results, and knowing which direction you want to go before you open Lightroom makes the difference between an edit that looks intentional and one that looks corrected.

This guide covers the Fuji stocks that matter for portrait work, what each one actually does to skin and color, and the Lightroom adjustments that let you use that character deliberately. You can find the full portrait range at Legendary Presets Fuji Lightroom Presets or browse the complete Lightroom Film Presets library if you want to compare the Fuji approach against Kodak.

Key takeaways

  • Fuji negative film stocks have a green-cyan shadow bias. Kodak runs warm and orange. These are real differences that show up in your Lightroom edit.
  • Pro 400H was designed to be shot overexposed at ISO 200-250. That workflow is built into the preset’s Tone Curve behavior. Understand it and you can use it intentionally.
  • The Pro 160 stocks (160C, 160S, 160NS) differ in subtle but real ways. 160NS is the most neutral, 160C leans cool, 160S leans soft and warm.
  • Astia 100F is a slide film, not a negative film. It behaves differently under exposure and gives a different skin rendering than the Pro range.
  • The Orange channel in HSL is where Fuji portrait edits get fine-tuned. Orange Saturation -5 to -10, Orange Hue +3 to +5 toward yellow.

    01.


    What are the best Fuji presets for portrait photography?

    Pro 400H for natural light, weddings, and any situation where you want soft, film-like skin with wide exposure latitude. Astia 100F for studio, editorial, and controlled light where you want the precision of slide film with portrait-flattering low contrast. Pro 160NS for clean, consistent results in controlled studio or mixed light. Pro 160S if you want a warmer, softer starting point. Neopan Acros 100 for black and white portrait work.

    02.

    Why Fuji film handles skin differently

    Most articles about Fuji portrait presets say something like “Fuji is great for skin tones” and leave it there. That is not useful if you want to make deliberate editing decisions. Here is what is actually happening.

    Skin tone comparison between Fujifilm Pro 400H and Kodak Portra 400 Lightroom presets
    Fuji shadow skin (left) sits cooler and more neutral. Kodak shadow skin (right) pushes warm and orange. Neither is better. They are different tools.

    Fuji’s C-41 color negative films have a dye-coupler chemistry that produces a slight green-cyan bias in shadow tones compared to Kodak’s C-41 process. In skin, this means:

    • Shadow areas on skin go slightly cooler and more neutral with Fuji stocks
    • Midtone skin stays relatively accurate
    • Highlights on skin can go slightly pink-magenta, which reads as flattering in controlled light

    Kodak Portra, by contrast, pushes skin warm in the shadows. The orange-red shadow bias is what gives Portra portraits their characteristic “warm film” feel.

    In Lightroom terms, this means the key adjustment panel for Fuji portrait work is HSL, specifically the Orange channel. The shadow green-cyan bias needs a small correction on the Orange Hue slider to stay natural: +3 to +5 toward yellow. The Orange Saturation also needs -5 to -10 to prevent the Vibrance boost from pushing skin too warm in the opposite direction.

    This is the adjustment most Fuji portrait guides skip. It is also the adjustment that separates Fuji portraits that look editorial from ones that look slightly off.

    For a direct comparison of how Fuji and Kodak handle color differently at the chemistry level, the Fuji vs Kodak Color Science guide covers the full technical breakdown.

    03.

    The Fuji portrait stocks, compared

    Wedding portrait processed with Fujifilm Pro 400H Lightroom preset
    The soft highlight roll-off of Pro 400H. Shot at ISO 200, not box speed. This is what the overexposure workflow produces.

    Fujifilm Pro 400H

    Pro 400H is the most important Fuji portrait stock and the most misunderstood. The misunderstanding comes from the ISO rating.

    Pro 400H is rated at ISO 400, but portrait photographers who shot it on film almost never exposed at box speed. The standard professional practice was to rate it at ISO 200 or ISO 250, intentionally overexposing by two-thirds to one stop. This was not a mistake. Fujifilm designed Pro 400H to be shot this way. At box speed, the film is accurate and slightly cool. Overexposed by a stop, the highlights lift and go soft, the shadows open, and the skin tones take on the pastel warmth that made it the default wedding and portrait film for a generation.

    In Lightroom, that behavior is built into the Pro 400H preset’s Tone Curve. The highlight roll-off is soft and gradual rather than clipping hard. The midtones have a gentle lift. The shadows are open rather than dense.

    What this means for your edit: if a Pro 400H preset looks flat or lacking contrast, resist the urge to push contrast back in. Instead, check that your exposure is slightly lifted rather than metered precisely. The softness is the point.

    Lightroom starting values with Pro 400H:

    • Highlights: -20 to -40 (less aggressive than slide stocks, the negative film rolls off softly)
    • Shadows: +10 to +20
    • Orange Hue: +3 to +5 (toward yellow, corrects shadow green-cyan)
    • Orange Saturation: -5 to -10
    • Vibrance: +10 to +15
    • Saturation: 0

    Best for: Weddings, natural light portraits, outdoor lifestyle, maternity, any situation where soft and forgiving is the goal.

    Astia 100F Lightroom preset for studio portraits
    Smooth, gentle skin tones with Fuji Astia 100F preset.

    Fujichrome Astia 100F

    Astia is a slide film, not a negative film. This matters because slide film behaves differently under exposure and renders color differently.

    Fujifilm designed Astia specifically for portrait and fashion work, with lower contrast than Provia or Velvia and a color response that flatters skin. The highlight roll-off is gentler than other slide films but still more abrupt than negative film. The shadow rendering is cool and clean rather than warm.

    The result in portraits is precise, editorial, and refined. Skin looks accurate rather than flattering. There is no warmth pushed in, no softness from overexposure latitude. What you shot is what you get, rendered with Fuji’s characteristic precision.

    This is Astia’s strength for studio and fashion work and its limitation for natural light emotional photography. A wedding in open shade will look beautiful with Pro 400H and slightly clinical with Astia. A studio portrait session under a softbox will look polished with Astia and potentially too soft with Pro 400H.

    Highlight handling with Astia: slide film clips faster than negative film. Pull Highlights to -30 to -50 before touching color. If your portrait subject is against a bright window or outdoor sky, protect the highlights first or you will lose them.

    Lightroom starting values with Astia:

    • Highlights: -30 to -50 (slide film clips faster)
    • Shadows: +5 to +15
    • Orange Hue: +2 to +4
    • Orange Saturation: -5
    • Vibrance: +8 to +12
    • Saturation: 0
    • Tone Curve: gentle S-shape, keep midtones flat

    Best for: Studio, editorial, fashion, controlled light, fine art portraits.

    Pro 160NS Lightroom preset for fine art portraits
    Clean, neutral color with Fuji Pro 160NS preset.

    Fujifilm Pro 160NS

    Pro 160NS is the most neutral of the Pro portrait stocks. “NS” stands for Natural Skin, which accurately describes its design intention: clean, consistent color with no strong bias toward warm or cool. Low contrast, fine grain, wide latitude.

    It was the choice of portrait photographers shooting controlled studio light who needed reproducible, accurate results across a full session. No surprises, no mood, just clean professional color.

    In Lightroom, the Pro 160NS preset gives you a flat, neutral starting point. It needs a little more work than Pro 400H to develop character, but it responds well to deliberate Tone Curve shaping and targeted color work because the neutral base does not fight corrections.

    Best for: Studio, fine art, close-up portrait work, sessions where consistency across many images matters more than a distinctive look.

    Fujifilm Pro 160C and Pro 160S

    These two stocks share the 160 speed and the wide latitude of Pro 160NS but have distinct color biases.

    Pro 160C leans cool. The C stands for Cool. In practice this means slightly cooler shadows and a more neutral-to-blue cast in highlights. For portrait work it suits photographers who want a modern, editorial feel rather than a warm, classic look. Mixed studio and window light conditions suit it well.

    Pro 160S leans soft and warm. The S stands for Soft. The warmth is subtle but present in the midtones, and the overall contrast is the lowest of the three 160 stocks. For natural light work where you want warmth without the pastel character of Pro 400H, Pro 160S is the right starting point.

    The practical question when choosing between the three 160 stocks is what direction your light is already going. If you are shooting in cool north light or against a window on an overcast day, 160S gives you warmth without having to push it in post. If you are shooting in golden hour warm light, 160C keeps the highlights from going too orange.

    All three are available together in the Fujifilm PRO Bundle with Pro 400H and Pro 800Z included. For portrait photographers who want to find their reference stock through real-world testing rather than guessing, the bundle is the practical way to do it.

    Fujifilm Pro 800Z

    Pro 800Z is the high-speed portrait stock. Muted, slightly warm shadows, enough grain to feel film-like, and a color response designed for ambient and event light where ISO 160 or 400 is not enough.

    For portrait photographers shooting receptions, events, dimly lit venues, and indoor natural light, Pro 800Z gives you a usable starting point without the extreme grain of Natura 1600. The muted color palette suits documentary-style portrait work better than the accurate pastels of the slower Pro stocks.

    In Lightroom, Pro 800Z needs the least highlight protection of the Pro portrait range. The muted character naturally prevents highlights from going too bright. Shadows need more lifting: +20 to +30 rather than the +10 to +15 used with the slower stocks.

    04.

    Portrait scenarios and which stock wins

    Outdoor natural light, bright conditions

    Pro 400H wins here. Wide latitude, forgiving in bright backlight, skin stays natural in direct sun without needing aggressive Orange Saturation correction. The softness of the highlight roll-off handles the kind of blown highlights you get in outdoor portraits without leaving a hard clip line.

    The one adjustment to watch: if your subject is backlit with a very bright background (a window, a white wall, an open sky), pull Highlights to -40 to -50 even with Pro 400H. The negative film latitude is wider than slide film but not infinite.

    Studio with controlled light

    Astia 100F or Pro 160NS depending on the mood. Astia for precise, editorial work. Pro 160NS for clean, consistent color across a full session. Neither one adds warmth you have not put in intentionally, which is what studio photographers often want.

    Tone Curve is more important in studio work than in natural light. Without the natural contrast of outdoor lighting, you have to build it yourself. A gentle S-curve with the highlight anchor pulled down 5-10 points and the shadow anchor lifted 3-5 points gives studio shots the depth that flat studio light removes.

    Weddings

    Pro 400H is the default. It has been the default for professional wedding photographers shooting film for 20 years for good reasons: forgiving, pastel, skin-flattering in variable light, and consistent across a full day from bright outdoor ceremony to dim reception room.

    For reception and low-light work within the same wedding job, Pro 800Z handles the transition without requiring a complete rethink of your edit. The two stocks share enough character that a gallery edited with Pro 400H in daylight and Pro 800Z in the evening feels cohesive.

    Backlit and high-key portraits

    Pro 400H handles backlit subjects better than any other Fuji portrait stock, but the key is the Tone Curve approach. Use the point on the Tone Curve at the top of the highlights range and pull it down 8-12 points before doing anything else. Then lift the shadows anchor up 5-8 points. This creates the lifted, airy quality that backlit portraits naturally want without blowing the background.

    The alternative that works specifically for high-key white or cream backgrounds: Astia 100F with Highlights at -50 and Whites at -20. Astia’s clean rendering of bright tones keeps the background from going grey while protecting the detail.

    Environmental and editorial portraits

    Pro 160C for cool, modern editorial. The slight cool cast suits environmental portraits in urban settings, industrial spaces, or anywhere the environment is cooler-toned than the subject. It keeps the subject from going too warm against a cool background.

    Pro 400H for warm, human documentary work. Market vendors, working portraits, travel people photography. The softness and warmth feel right for subjects whose environment is also warm.

    Neopan Acros 100 Lightroom preset for black and white portraits
    Crisp, timeless black and white with Neopan Acros 100 preset.

    Black and white portraits

    Neopan Acros 100 for fine art and studio black and white. One of the finest-grained monochrome emulsions in the Fuji range: clean tonal transitions, good midtone separation, handles close-up detail well.

    Neopan 400 for environmental and documentary black and white portraiture. More contrast, more grain, more atmosphere. For subjects where the mood of the image matters more than technical perfection.

    When converting to black and white in Lightroom for portrait work:

    • Pull the Red and Orange sliders down -10 to -20 in Color Mix to darken skin slightly
    • Lift Yellow and Green +5 to +10 to open clothing and background
    • Reduce Contrast to 0 before adding a Tone Curve S-shape (the conversion increases apparent contrast)
    • Grain last: Acros 100 at Amount 12-18, Size 18-25, Roughness 40-50
    Three Fuji portrait Lightroom presets compared by shooting scenario
    Left: Pro 400H for weddings. Centre: Astia for studio. Right: Pro 800Z for events. Same brand, different tools.

    05.

    Fuji portrait preset quick reference

    Stock Character Skin rendering Best scenario Latitude
    Pro 400H Soft, pastel, slightly warm highlights Natural, forgiving Weddings, natural light Wide
    Astia 100F Low contrast, precise, editorial Cool, accurate Studio, fashion, editorial Moderate
    Pro 160NS Neutral, clean, fine grain Accurate, no bias Studio, controlled light Wide
    Pro 160C Slightly cool shadows Cool, modern Mixed and cool light Wide
    Pro 160S Soft, slightly warm midtones Warm, gentle Natural light, golden hour Wide
    Pro 800Z Muted, ambient, slightly warm shadows Film-like, event-ready Receptions, low light Moderate
    Neopan Acros 100 Clean, fine grain B&W Smooth tonal range Fine art B&W portraits Wide
    Neopan 400 Punchy, gritty B&W High contrast Documentary B&W Moderate

    06.

    The Lightroom adjustments that matter most for Fuji portrait work

    Orange channel in HSL: the most important panel. Fuji’s green-cyan shadow bias shows up most clearly in Orange tones, which is where most skin sits. Two moves correct it and let you control the warmth deliberately:

    • Orange Hue: +3 to +5 (shift toward yellow). This corrects the shadow coolness without affecting the midtone skin accuracy.
    • Orange Saturation: -5 to -10. Keeps Vibrance from pushing skin too saturated.

    Tone Curve over Contrast slider. Portrait skin textures live in the midtones. The Contrast slider compresses midtones symmetrically, which flattens skin texture and can make faces look plastic. A Tone Curve S-shape with the midtone section kept flat adds contrast at the tonal ends where it adds depth, without touching the midtone range where the face lives.

    Highlights: pull before touching color. Whether you are using a slide stock (Astia) or a negative stock (Pro 400H), protecting highlights first prevents color corrections from looking strange in the bright areas of the frame. Pull Highlights -20 to -50 depending on the stock before moving to the HSL panel.

    Vibrance, not Saturation. Vibrance lifts under-saturated tones while protecting skin, which is close to how film naturally adds color depth. Global Saturation lifts everything including skin and produces oversaturation easily. Keep Saturation at 0 and use Vibrance +10 to +15.

    White balance for portrait light:

    • Natural light outdoors: 5000-5600K, Tint 0 to +3
    • Overcast: 5800-6200K to compensate for the blue cast
    • Studio strobe (daylight balanced): 5500-5800K
    • Golden hour: warm up to 6000-6800K rather than correcting back to neutral

    07.

    FAQ

    What is the difference between Pro 400H and Astia 100F for portraits?

    Pro 400H is a color negative film. It has wide exposure latitude, soft highlight roll-off, and a pastel warmth that comes from its overexposure workflow. Astia 100F is a slide film. It has more precise color rendering, lower contrast, and less latitude. Pro 400H is more forgiving and suits natural light emotional work. Astia is more precise and suits studio and editorial work. If you are buying one stock for general portrait use, start with Pro 400H.

    Why does Pro 400H look soft compared to other presets?

    Because the softness is built into the film’s intended workflow. Pro 400H was designed to be shot at ISO 200-250, one stop overexposed. The soft, pastel tones come from that overexposure behavior. In Lightroom, if the preset looks too soft, check that your exposure is slightly lifted rather than adding Contrast back in. The character of the film is the soft lift, not a processing error.

    Do Fuji portrait presets work on darker skin tones?

    Yes, with attention to the Orange and Red channels in HSL. The green-cyan shadow bias in Fuji negative stocks requires slightly different correction for darker skin tones where the shadow areas are more significant. Orange Saturation -8 to -12 rather than -5. Orange Hue +4 to +6 toward yellow. Red Hue +2 to +4 toward orange. These moves keep shadow skin from going too cool without pushing midtone skin toward orange.

    What is the difference between Pro 160C, 160S, and 160NS?

    All three are ISO 160 color negative portrait films with wide latitude and fine grain. 160NS (Natural Skin) is the most neutral, designed for accurate, reproducible results. 160C (Cool) has a slight cool bias in the shadows and suits mixed or cool light conditions. 160S (Soft) has the lowest contrast of the three and a slight warmth in the midtones, suited for golden hour and warm-light natural portrait work. The Fujifilm PRO Bundle includes all three so you can test them on your own work.

    How do I protect skin tones when using Vibrance on Fuji portrait presets?

    Two moves in HSL: Orange Saturation -5 to -10 and Orange Hue +3 to +5 toward yellow. Vibrance lifts muted tones first and should protect already-saturated skin in theory, but Fuji’s color profile shifts the point where skin starts to oversaturate slightly earlier than expected. The Orange channel correction is what keeps it in check.

    08.

    Final thoughts

    Fuji portrait presets work best when you understand the direction the film’s chemistry is already pulling and either work with it or make deliberate corrections to steer away from it.

    The green-cyan shadow bias is the most important thing to know. The overexposure workflow built into Pro 400H is the second. The slide-vs-negative distinction for Astia vs the rest of the Pro range is the third.

    With those three things clear, the preset becomes a starting point with known behavior rather than a black box. The Orange channel corrections take 30 seconds. The Tone Curve shaping takes a minute. The rest is your eye.

    The full Fuji portrait range is at Legendary Presets.

    Related reading:

    Richard is a commercial and editorial photographer with over 15 years behind the lens. He’s shot on film and digital across three continents, and still keeps a Nikon F3 loaded with Kodak Portra on his desk. At LegendaryPresets, he leads preset development – studying actual film scans to make sure every stock behaves like the real thing.