Home | Articles | Analog Film
Kodak TRI-X 400 Lightroom Preset: Street Photography’s Black & White
Richard ♦ June 19, 2026 ♦ 11 min read

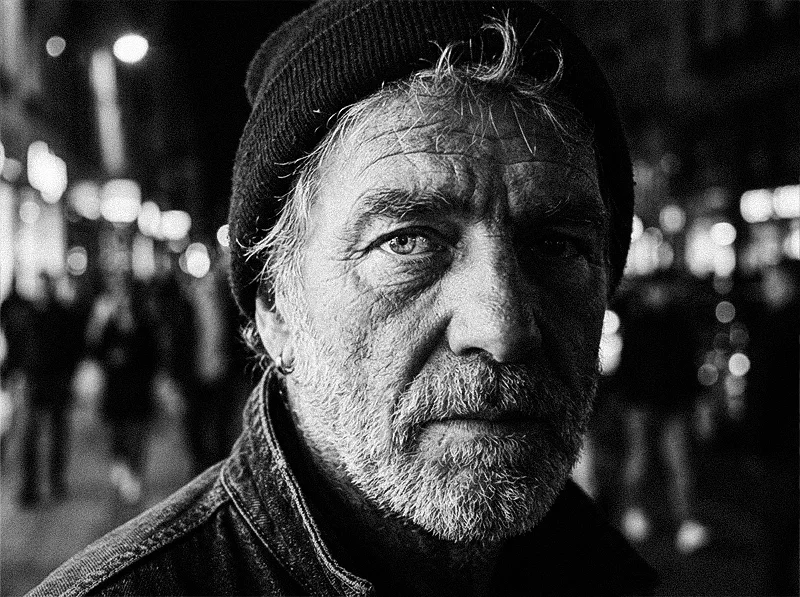
There’s a reason almost every iconic street photograph you know was shot on Kodak TRI-X 400. The grain. The contrast. The way shadows go deep and skin holds detail at the same time. That combination isn’t random. It’s the optical character of a specific film emulsion, and it took Kodak decades to get right.
You don’t need a film camera to use it. The Kodak TRI-X 400 Lightroom preset brings that exact tonal character to your digital RAW files: the channel response, the characteristic contrast curve, and the grain structure of TRI-X at ISO 400, all encoded into a single click.
This article covers what makes TRI-X look the way it does, how to apply and adjust the preset in Lightroom, and how to get the most from it across different street photography situations. If you’re exploring the full range, the black and white film preset collection covers every major B&W stock.
Key Takeaways
- TRI-X 400’s signature look comes from three things: high native contrast, pronounced irregular grain, and a spectral response that deepens blues and lifts reds
- The preset works on any colour RAW file. You don’t need to shoot in black and white in-camera
- TRI-X grain is coarse and irregular by design. Resist the urge to reduce it right away. It’s the visual signature of the film
- Pushing the exposure slightly before applying the preset (around +0.3 to +0.5) brings shadows in line with how TRI-X responded to slight overexposure in the field
- For a direct comparison with T-MAX, see the Kodak TRI-X vs T-MAX guide
01.
What Makes TRI-X Look the Way It Does
TRI-X 400 was introduced by Kodak in 1940 and reformulated to ISO 400 in 1960. For the next four decades it was the default film for photojournalists, street photographers, and documentary shooters worldwide. Garry Winogrand, Daido Moriyama, Henri Cartier-Bresson, Sebastião Salgado. All TRI-X.

TRI-X grain is coarse and irregular. It clusters in shadow areas and varies across the frame. That organic quality is what separates it from digital noise. The reason it became the street photographer’s film isn’t nostalgia. TRI-X had a specific set of technical properties that suited street shooting better than anything else available.
Native contrast. TRI-X has a steeper characteristic curve than most ISO 400 films. Shadows go darker, highlights stay bright. In street situations with harsh midday light, pools of shadow, and backlit subjects, that contrast does the compositional work for you.
Spectral response. TRI-X is panchromatic with a slight bias toward rendering blues darker and warm tones slightly brighter. On a street scene, skies go deep and skin holds tonal detail. The separation between a face and a background is built into the film’s chemistry, not achieved in post.
Grain character. TRI-X grain is coarse, irregular, and clearly visible, especially in shadow areas. It’s not uniform like T-MAX grain. It clusters and varies, which is why it reads as organic rather than digital. At ISO 400 it’s prominent. Push it to 1600 and it becomes the dominant visual element of the image.
When Legendary Presets built the TRI-X 400 preset, these three properties are what was encoded: the contrast curve, the channel response, and the grain structure. The result behaves like TRI-X in Lightroom rather than approximating it.
02.
Applying the Preset in Lightroom
Start with a solid RAW exposure
TRI-X had wide exposure latitude. It handled overexposure well and recovered underexposed shots in development. In Lightroom, the same principle applies: start from a well-exposed RAW, apply the preset, then adjust.

The TRI-X preset applies the film’s spectral response directly to the B&W Mix panel. Reds weighted up, blues down. This is what the B&W slider doesn’t give you. - Shadows feel flat? Pull Blacks down 5–10 points
- Highlights clipping? Bring Whites down slightly. The preset replicates TRI-X’s natural highlight roll-off, but extreme overexposure in the RAW will still clip
- Overall feel too low contrast? The preset is calibrated for well-exposed files. Check your exposure first before adding contrast manually
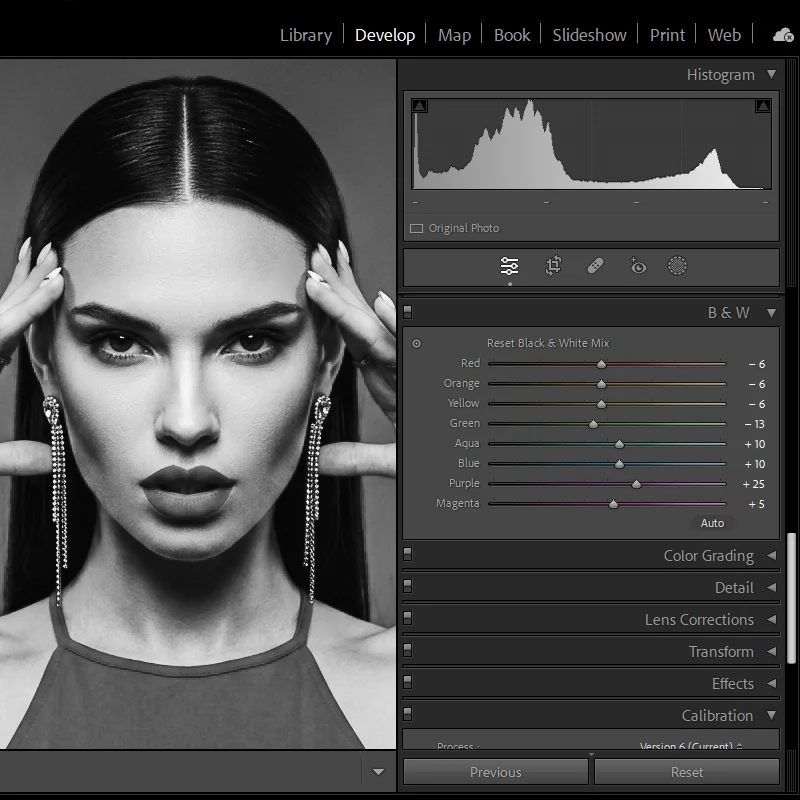
The B&W Mix panel
The TRI-X preset applies the film’s channel response directly to the B&W Mix, not the neutral default Lightroom uses. Open the panel after applying and you’ll see:
- Reds weighted slightly higher: skin and warm tones hold more detail
- Blues weighted slightly lower: skies go deeper, cool shadows darken
- Oranges and yellows elevated: faces and warm midtones separate from backgrounds
If the balance feels off for a specific image, for example very warm artificial light, adjust the individual channel sliders. The preset sets the baseline. You finish the edit.
Grain
The TRI-X preset applies high Amount, larger Size, and high Roughness, matched to the film’s actual grain structure. It will feel heavy at first, especially coming from clean digital B&W.
- Don’t reduce it immediately. Look at the full image at viewing size, not 100% crop. TRI-X grain reads very differently at actual viewing scale. It’s adding texture and depth, not noise.
- If it genuinely needs to come down, reduce Amount first. Keep Roughness high. Lowering it makes the grain uniform and modern, which kills TRI-X’s character.
- Avoid adding Noise Reduction on top of the preset. It smooths out the grain structure and makes the image look digital again.
03.
Street Photography Situations: How to Adjust
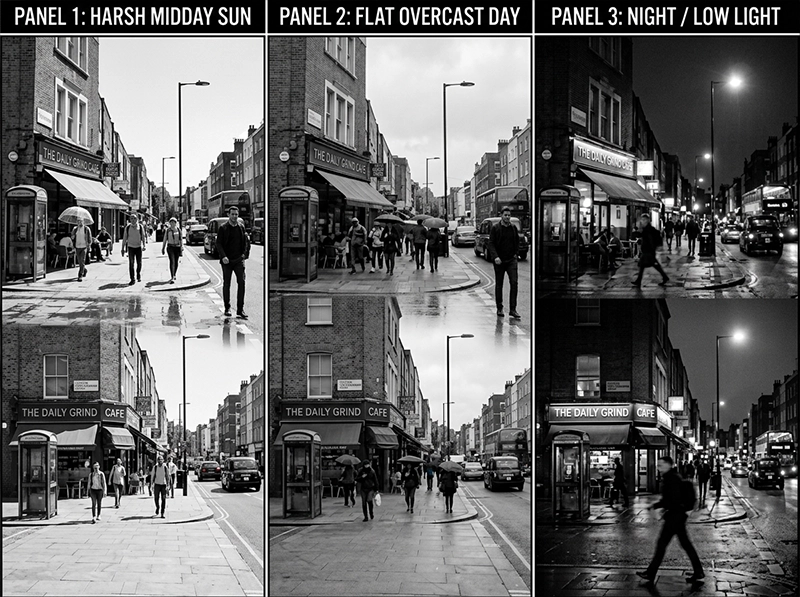
Harsh midday light
This is TRI-X territory. The high native contrast handles hard light naturally. Shadows go deep, highlights stay controlled. Apply the preset, check the histogram, and you’re likely done.
- Shadows blocking completely? Bring Shadows up 10–15 points to retain some detail without losing the high-contrast feel
- Highlights clipping on bright surfaces? Whites down 5–10 points, keep the rest as-is
- Generally: this lighting condition needs the least adjustment of all four scenarios
Overcast or flat light
Flat light is TRI-X’s least natural environment. The preset will feel lower contrast than expected because there’s less tonal separation in the original image to work with.
- Pull Blacks down to -20 to deepen shadows and create separation where the flat light suppressed it
- Push Clarity up to +15 or +20 to add micro-contrast and recover the edge definition TRI-X had in harder light
- Avoid using the Contrast slider alone. It makes flat images look processed rather than filmic
- Texture slider at +10 can help if the subject has surface detail like clothing, skin, or architecture
Low light and indoor shooting
TRI-X was the photojournalist’s push film for dark environments. Simulate that pushed character in Lightroom:
- Grain Amount: 60–70 (up from preset default)
- Grain Size: 40–50 (coarser, more pushed-film character)
- Blacks: -30 to deepen the shadows deliberately
- Exposure: -0.3 if the scene feels too bright. Pushed TRI-X in dark rooms was underlit by design
- The result reads like TRI-X at ISO 1600: more grain, darker shadows, stronger atmosphere
The same TRI-X preset across three different lighting conditions. Each requires minor adjustments, but the tonal character stays consistent throughout. Portraits on the street
TRI-X isn’t a portrait-first film, but it produces strong street portraits when the light is directional and the subject has defined features.
- Grain Roughness: down to 60 (from preset default). Grain on skin reads as texture rather than noise at the lower roughness setting
- Highlights: down slightly to protect the face if light is coming from above
- Reds in B&W Mix: up 5 points if skin is rendering too dark for the subject
- Keep the contrast. Softening it removes the street portrait energy TRI-X naturally pro
04.
TRI-X vs Other B&W Film Presets
TRI-X is the right choice for most street and documentary work. But it’s worth knowing when to reach for something else.
Situation TRI-X 400 Better alternative Fine art portraits in studio Grain too heavy Kodak T-MAX 400 Landscape in good light Contrast too high Kodak T-MAX 100 Low light, maximum atmosphere Good Kodak T-MAX 3200 for more grain Fuji tonal character preferred N/A Fujifilm Neopan 400 Street portraits, forgiving grain Works Neopan 400 for finer grain For a full side-by-side breakdown of TRI-X vs the T-MAX family, covering grain structure, contrast, and use cases, see the Kodak TRI-X vs T-MAX Lightroom preset guide.
05.
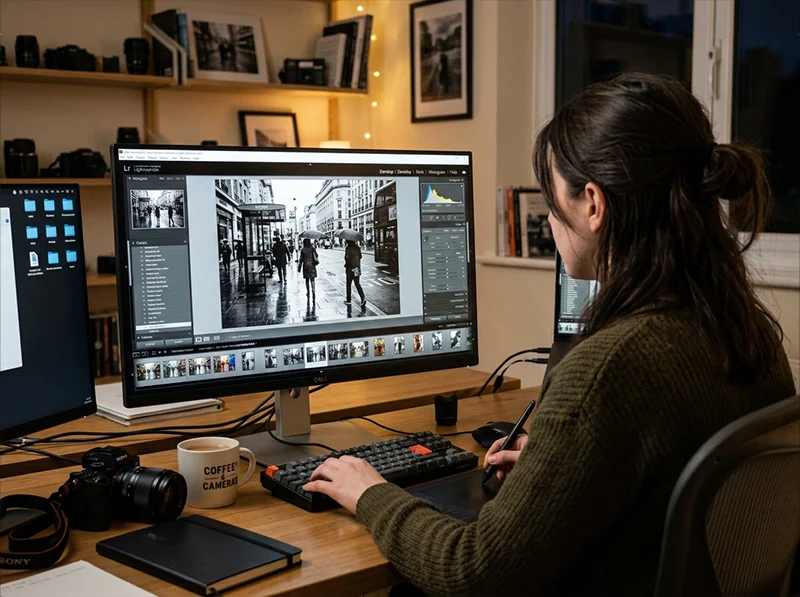
A Practical Lightroom Workflow for Street Shooting
Applying presets on import and syncing adjustments across similar exposures keeps a street photography editing session fast without sacrificing consistency. If you’re shooting street and applying TRI-X presets in volume, here’s a workflow that keeps things fast:
- Apply preset on import: set the TRI-X preset as your import default for any session you’re editing as street B&W
- Batch exposure correction: select all images, set a baseline exposure that works for most of the set, then refine individually
- Flag before adjusting: go through the set at 1:1 and flag keepers before touching individual adjustments. Don’t edit images you won’t use.
- Sync adjustments across similar shots: street sessions often have consistent light. Sync your adjustments from the strongest image across similar exposures, then tweak individually
- Check grain at export size: TRI-X grain looks different at 2000px for Instagram vs full resolution for print. Check at your actual output size before finalisi
06.
FAQ
Does the TRI-X 400 Lightroom preset work on colour RAW files?
Yes. The preset converts your colour RAW to black and white using TRI-X’s channel response, applying TRI-X’s tonal bias to the colour information in your file. You get better results from a RAW file than a JPEG because the B&W Mix has more colour data to work with.
Can I use the TRI-X preset on portrait photography?
You can, but it’s worth adjusting. TRI-X’s high contrast and heavy grain aren’t ideal for clean portrait work. For portraits, reduce the grain Amount to around 30–35 and consider pulling the Contrast slider down by 10 points. The channel response will still give you TRI-X’s warm-skin rendering without the full street photography intensity.
What’s the difference between the TRI-X preset and Lightroom’s built-in B&W profiles?
Lightroom’s built-in profiles apply generic tonal adjustments. They don’t encode the spectral response, characteristic curve, or grain structure of any real film. The TRI-X preset is built from the actual optical properties of the film, which produces a result that behaves differently across different subjects and colour temperatures.
How do I simulate pushing TRI-X to ISO 1600 in Lightroom?
After applying the preset, increase grain Amount to 65–70, Size to 45, and Roughness to 80. Pull Blacks down to -25 to -35. Reduce Shadows slightly. The result mimics the increased grain density and shadow depth of pushed TRI-X without altering the core tonal character of the preset.
Should I shoot in RAW or JPEG when using TRI-X film presets?
Always RAW. The B&W Mix channel response in the preset uses the full colour data in your RAW file to build the conversion. JPEGs have already been processed in-camera and have less colour information for the preset to work with. The result will be less accurate to the film’s tonal response.
Related Articles
- Black and White Lightroom Presets: The Complete Guide to Film-Based B&W
- Kodak TRI-X vs T-MAX: Which B&W Film Preset Is Right for You?
- Agfa Scala 200X: The World’s Only Black & White Slide Film Preset
Richard is a commercial and editorial photographer with over 15 years behind the lens. He’s shot on film and digital across three continents, and still keeps a Nikon F3 loaded with Kodak Portra on his desk. At LegendaryPresets, he leads preset development – studying actual film scans to make sure every stock behaves like the real thing.